آموزش کامل استفاده از صفت Class در HTML

صفت class در HTML
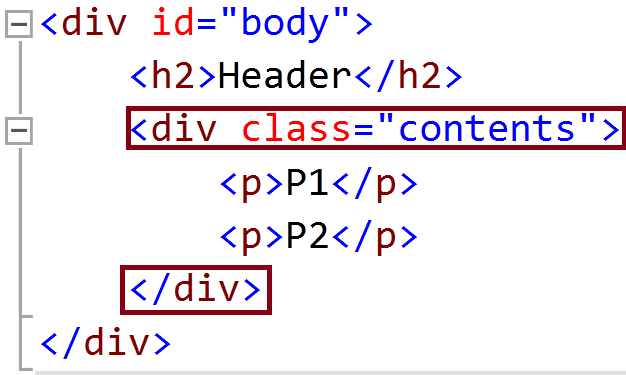
صفت class در واقع یک یا چند نام کلاس را برای یک عنصر html توصیف می کند. که هر کدام از این روشها ، کاربرد متفاوتی دارد.
در ادامه این بحث به آموزش استفاده از صفت class در html ، می پردازیم.

آموزش استفاده از صفت class در html
صفت class اغلب برای اشاره به نام یک کلاس در فایل css استفاده می شود.
نام صفت class یک عنصر html می تواند در کد های css و جاوا اسکریپت استفاده شود. در css با استفاده از نام class یک عنصر html می توان style آن عنصر در css تغییر داد. و در جاوااسکریپت نیز می توان با استفاده از مشخصه class یک عنصر، یک رفتار خاص را برای آن عنصر تعریف کرد.
در مثال زیر سه عنصر <div> با یک classصفت با مقدار “city” داریم. سبک هر سه عنصر <div> بطور یکسان مطابق با تعریف سبک .city در بخش head استایل بندی میشوند:
بهتر است بدانید که برای معرفی کلاسها در css بایستی در ابتدای نام آنها یک نقطه بگذارید. مانند : city.
|
1 2 3 4 5 6 7 8 9 10 11 12 13 14 15 16 17 18 19 20 21 22 23 24 25 26 27 28 29 30 31 32 |
<!DOCTYPE html> <html> <head> <style> .city { background-color: tomato; color: white; border: 2px solid black; margin: 20px; padding: 20px; } </style> </head> <body> <div class="city"> <h2>آپ وب</h2> <p>فروش هاست پر سرعت </p> </div> <div class="city"> <h2>upweb.ir</h2> <p>فروش هاست پر سرعت</p> </div> <div class="city"> <h2>upweb</h2> <p>فروش هاست پر سرعت</p> </div> </body> </html> |

استفاده از class در عناصر inline
در مثال زیر دو عنصر <span> با ویژگی class با مقدار “note” داریم. هر دو عنصر <span> مطابق با تعریف سبک .note در بخش head به صورت یکسان استایل بندی می شوند:
|
1 2 3 4 5 6 7 8 9 10 11 12 13 14 15 16 17 |
<!DOCTYPE html> <html> <head> <style> .note { font-size: 120%; color: red; } </style> </head> <body> <h1>My <span class="note">Important</span> Heading</h1> <p>This is some <span class="note">important</span> text.</p> </body> </html> |

Syntax برای ایجاد class
اولین و مهمترین نکته قابل درک در نحو استفاده از HTML استفاده از عناصر و تگ ها است. هر عنصر HTML توسط یک تگ باز و یک تگ بسته شده در اطراف محتوای آن ها تعریف می شود
برای ایجاد یک class؛ یک کاراکتر نقطه (.) و به دنبال آن نام کلاس بنویسید. سپس، ویژگی های CSS را در تگ های {} تعریف کنید:
|
1 2 3 4 5 6 7 8 9 10 11 12 13 14 15 16 17 18 19 20 21 22 23 24 25 26 27 |
<!DOCTYPE html> <html> <head> <style> .city { background-color: tomato; color: white; padding: 10px; } </style> </head> <body> <h2>The class Attribute</h2> <p>Use CSS to style elements with the class name "city":</p> <h2 class="city">London</h2> <p>London is the capital of England.</p> <h2 class="city">Paris</h2> <p>Paris is the capital of France.</p> <h2 class="city">Tokyo</h2> <p>Tokyo is the capital of Japan.</p> </body> </html> |

کلاس های چندگانه در HTML
عناصر HTML می توانند به بیش از یک کلاس تعلق داشته باشند.
برای تعریف چند کلاس، نام کلاس ها را با یک فاصله جدا کنید، به عنوان مثال. <div class=”city main”>. این عنصر با توجه به تمام کلاس های مشخص شده استایل بندی می شود.
در مثال زیر، اولین عنصر <h2> هم به کلاسcity و هم به کلاس اصلی تعلق دارد و استایل CSS را از هر دو کلاس دریافت می کند:
|
1 2 3 4 5 6 7 8 9 10 11 12 13 14 15 16 17 18 19 20 21 22 23 24 25 26 |
<!DOCTYPE html> <html> <head> <style> .city { background-color: tomato; color: white; padding: 10px; } .main { text-align: center; } </style> </head> <body> <h2>Multiple Classes</h2> <p>Here, all three h2 elements belongs to the "city" class. In addition, London also belongs to the "main" class, which center-aligns the text.</p> <h2 class="city main">London</h2> <h2 class="city">Paris</h2> <h2 class="city">Tokyo</h2> </body> </html> |

استفاده از یک نام class ، برای تگ های مختلف
عناصر مختلف HTML می توانند به یک نام کلاس اشاره کنند.
در مثال زیر، هر دو <h2> و <p> به کلاس “city” اشاره می کنند و استایل یکسانی دارند:
|
1 2 3 4 5 6 7 8 9 10 11 12 13 14 15 16 17 18 19 20 21 22 |
<!DOCTYPE html> <html> <head> <style> .city { background-color: tomato; color: white; padding: 10px; } </style> </head> <body> <h2>Different Elements Can Share Same Class</h2> <p>Even if the two elements do not have the same tag name, they can both point to the same class, and get the same CSS styling:</p> <h2 class="city">Paris</h2> <p class="city">Paris is the capital of France.</p> </body> </html> |

استفاده از صفت class در جاوااسکریپت
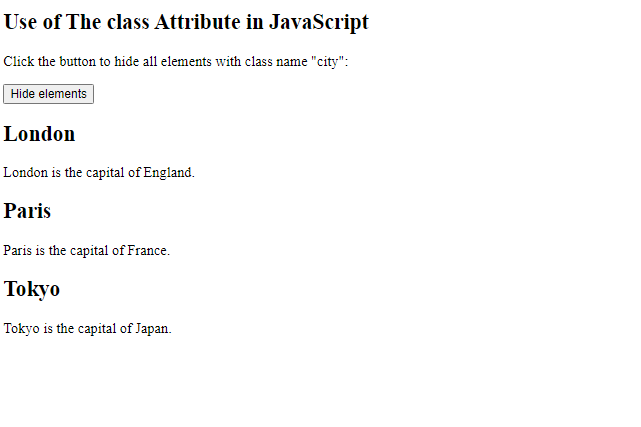
جاوااسکریپت می تواند به عناصر html با استفاده از صفت class و با استفاده از تابع () getElementsByClassName دسترسی پیدا کند.
مثال: زمانیکه کاربر روی یک button کلیک کند تمام عناصر که دارای صفت class با نام “city” هستند. مخفی شوند:
|
1 2 3 4 5 6 7 8 9 10 11 12 13 14 15 16 17 18 19 20 21 22 23 24 25 26 27 28 29 |
<!DOCTYPE html> <html> <body> <h2>Use of The class Attribute in JavaScript</h2> <p>Click the button to hide all elements with class name "city":</p> <button onclick="myFunction()">Hide elements</button> <h2 class="city">London</h2> <p>London is the capital of England.</p> <h2 class="city">Paris</h2> <p>Paris is the capital of France.</p> <h2 class="city">Tokyo</h2> <p>Tokyo is the capital of Japan.</p> <script> function myFunction() { var x = document.getElementsByClassName("city"); for (var i = 0; i < x.length; i++) { x[i].style.display = "none"; } } </script> </body> </html> |


